Hello,
since some people were wondering how I made some of my images, I decided to write a short tutorial on how to use the coupling loops formula in phs.ufm which I used several times over the last months.
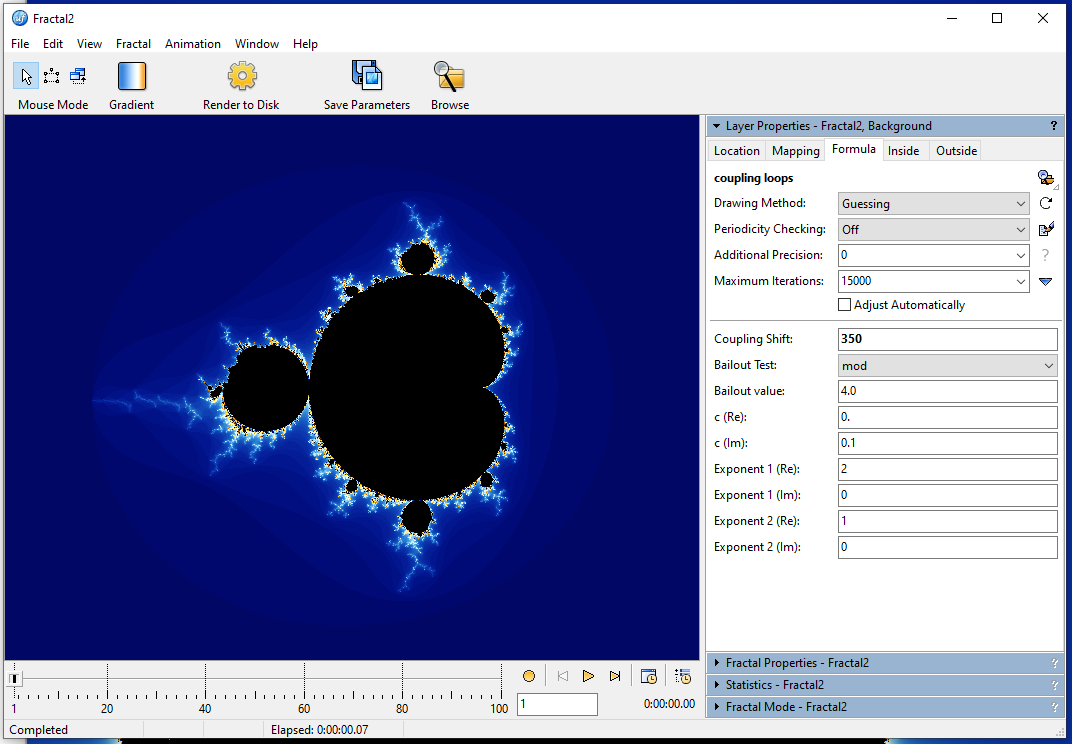
When you first open it, this is what it looks like. The loopy stuff is located in the valleys of the main set and also the minibrots. As a rule of thumb, the higher c is, the stronger the perturbations. If you are looking for loops in small minibrots, you will have to pick very small values for c. Its also depends on Exponent 2. Play around with the values to get an idea. They explorer tool is great to find good values by zooming in or out until the changes become noticable but not too extreme.
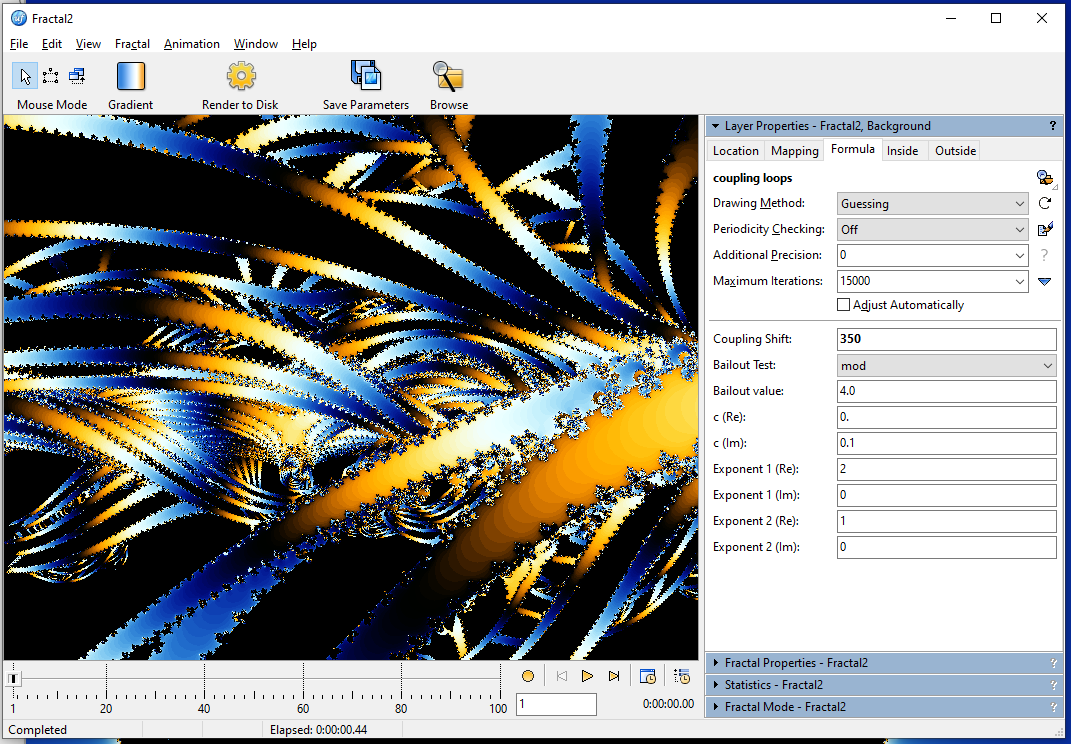
Here, I changed the Coupling Shift from 50 to 350 (this will cause fewer perturbations and generate more parallel bands within the spirals). Then I zoomed into the valley between the main cardioid and the period 3 bulb (the one sitting right on top). You can clearly see the effect of the perturbations here.
Make sure to turn off Periodicity Checking before activating the switching mode, or you will get a lot of false inside pixels. Using the switching mode in this area gave me this:
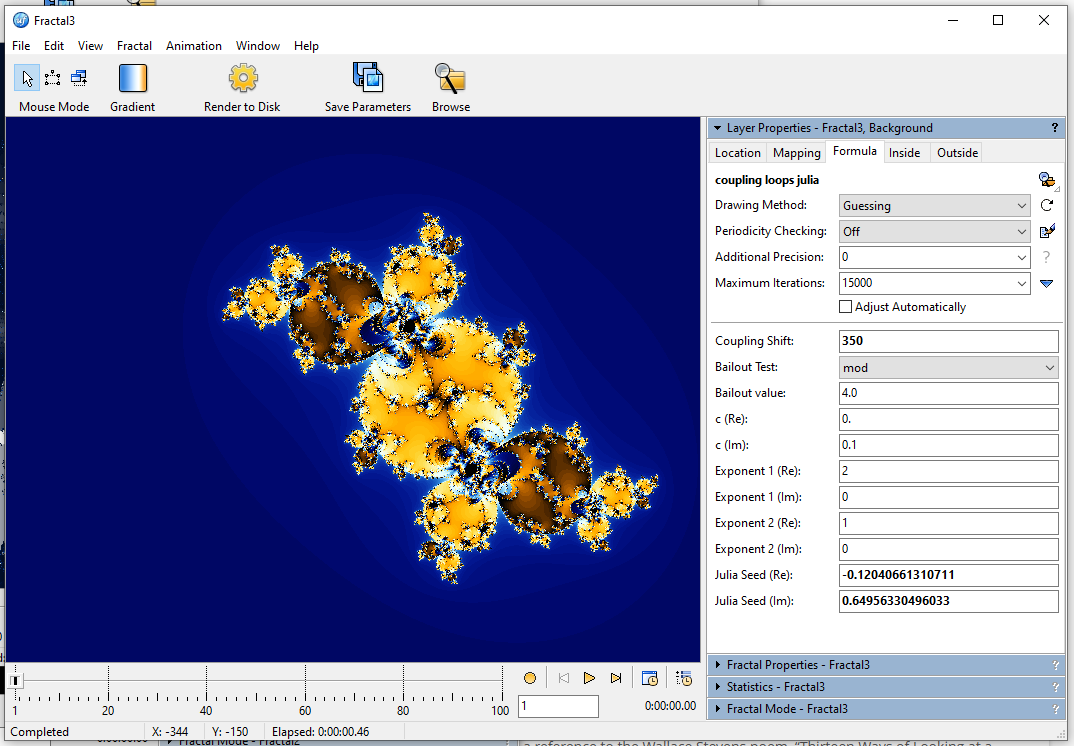
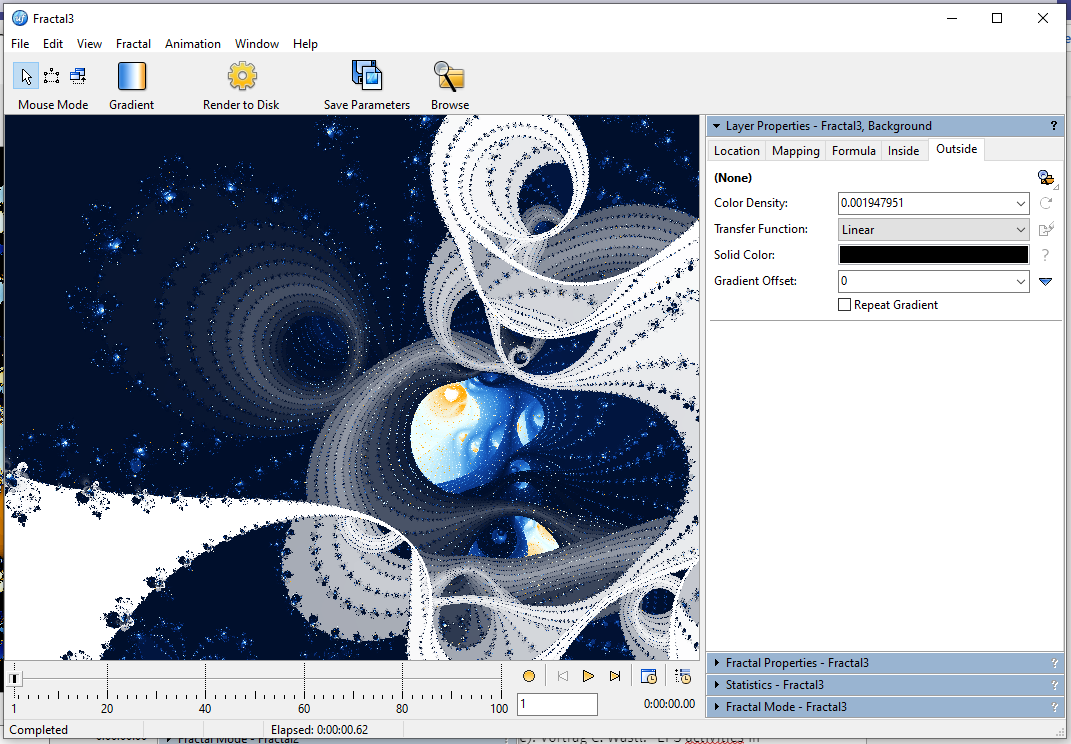
I zoomed into one of the spirals and increased the max iteration count from 15k to 125k):
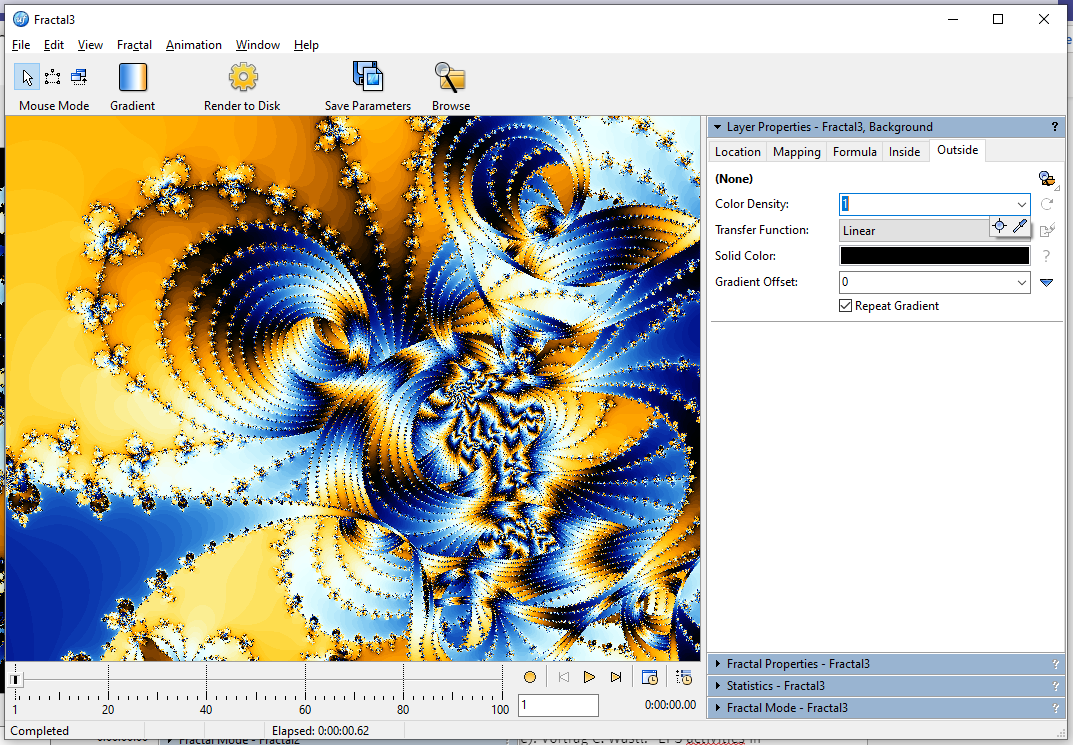
One very simple thing you can do is reducing the color density greatly to stretch the gradient over the entire image, turn of Repeat Gradient, and modify it to your liking. Here's a very simple example:
Now you have all the option you have for any other shape, just be aware that these images can get quite costly to render because the iteration counts can get extremely high.
Parameters for last image:
Fractal3 {
fractal:
  title="Fractal3" width=694 height=545 layers=1
  credits="Phillip;2/4/2022"
layer:
  caption="Background" opacity=100
mapping:
  center=0.1027243919/-0.4305174228 magn=8.2482413
formula:
  maxiter=125000 percheck=off filename="phs.ufm"
  entry="coupling_loops_julia" p_dkmax=350 p_test=mod p_bailout=4.0
  p_c=0./0.1 p_exp1=2/0 p_exp2=1/0
  p_seed=-0.12040661310711/0.64956330496033
inside:
  transfer=none
outside:
  density=0.001947951 transfer=linear repeat=no
gradient:
  smooth=yes rotation=58 index=0 color=16777215 index=64 color=2756096
  index=137 color=13331232 index=226 color=16777197 index=320
  color=43775
opacity:
  smooth=no index=0 opacity=255
}
Have fun playing with this! 
Hello,
since some people were wondering how I made some of my images, I decided to write a short tutorial on how to use the coupling loops formula in phs.ufm which I used several times over the last months.
When you first open it, this is what it looks like. The loopy stuff is located in the valleys of the main set and also the minibrots. As a rule of thumb, the higher **c** is, the stronger the perturbations. If you are looking for loops in small minibrots, you will have to pick very small values for **c**. Its also depends on **Exponent 2**. Play around with the values to get an idea. They explorer tool is great to find good values by zooming in or out until the changes become noticable but not too extreme.

Here, I changed the **Coupling Shift from 50 to 350** (this will cause fewer perturbations and generate more parallel bands within the spirals). Then I zoomed into the valley between the main cardioid and the period 3 bulb (the one sitting right on top). You can clearly see the effect of the perturbations here.

Make sure to turn off Periodicity Checking before activating the switching mode, or you will get a lot of false inside pixels. Using the switching mode in this area gave me this:

I zoomed into one of the spirals and increased the max iteration count from 15k to 125k):

One very simple thing you can do is reducing the color density greatly to stretch the gradient over the entire image, turn of Repeat Gradient, and modify it to your liking. Here's a very simple example:

Now you have all the option you have for any other shape, just be aware that these images can get quite costly to render because the iteration counts can get extremely high.
Parameters for last image:
````
Fractal3 {
fractal:
title="Fractal3" width=694 height=545 layers=1
credits="Phillip;2/4/2022"
layer:
caption="Background" opacity=100
mapping:
center=0.1027243919/-0.4305174228 magn=8.2482413
formula:
maxiter=125000 percheck=off filename="phs.ufm"
entry="coupling_loops_julia" p_dkmax=350 p_test=mod p_bailout=4.0
p_c=0./0.1 p_exp1=2/0 p_exp2=1/0
p_seed=-0.12040661310711/0.64956330496033
inside:
transfer=none
outside:
density=0.001947951 transfer=linear repeat=no
gradient:
smooth=yes rotation=58 index=0 color=16777215 index=64 color=2756096
index=137 color=13331232 index=226 color=16777197 index=320
color=43775
opacity:
smooth=no index=0 opacity=255
}
````
Have fun playing with this! :)
 alt="61fd4168c08df.jpg">
